
Content
- Introduction
- Code preparation
- Data collection and preprocessing
- Data Labeling
- Model training and inference
Introduction
 Object Detection demo using YOLOV8
This tutorial aims to provide a starter project for image data collection for Hard Hat detection using Jetson Nano and a web camera. We will utilize the training pipeline from Ultralytics.
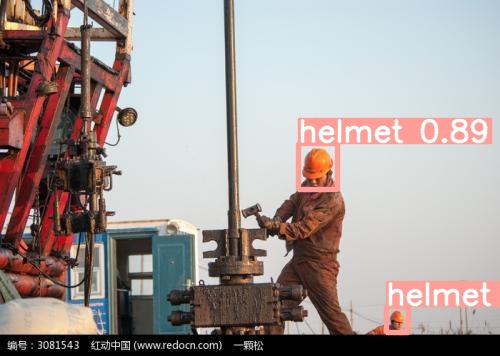 A test example of YOLOv8 for Hard hat detection
There are many other interesting projects from Jetson Community.
Code preparation
Python virtual environment
virtualenv is a virtual environment tool for organizing Python packages for projects. It is very helpful when you have multiple projects with different package dependencies requirements. To install virtualenv, open a terminal and run:
1
2
3
4
sudo apt-get install python3-pip
sudo pip3 install virtualenv
sudo apt install python3.8
sudo apt install libpython3.8-dev
To create a virtual environment, run:
1
virtualenv your_env_name --python=python3.8
To activate the created virtual environment, run:
1
source ./your_env_name/bin/activate
and you can see your_env_name is activated:
Data collection and preprocessing
We will first make sure we can receive images from the web camera using opencv-python package.
Camera Installation
Connect the web camera to Jetson Nano through USB port.
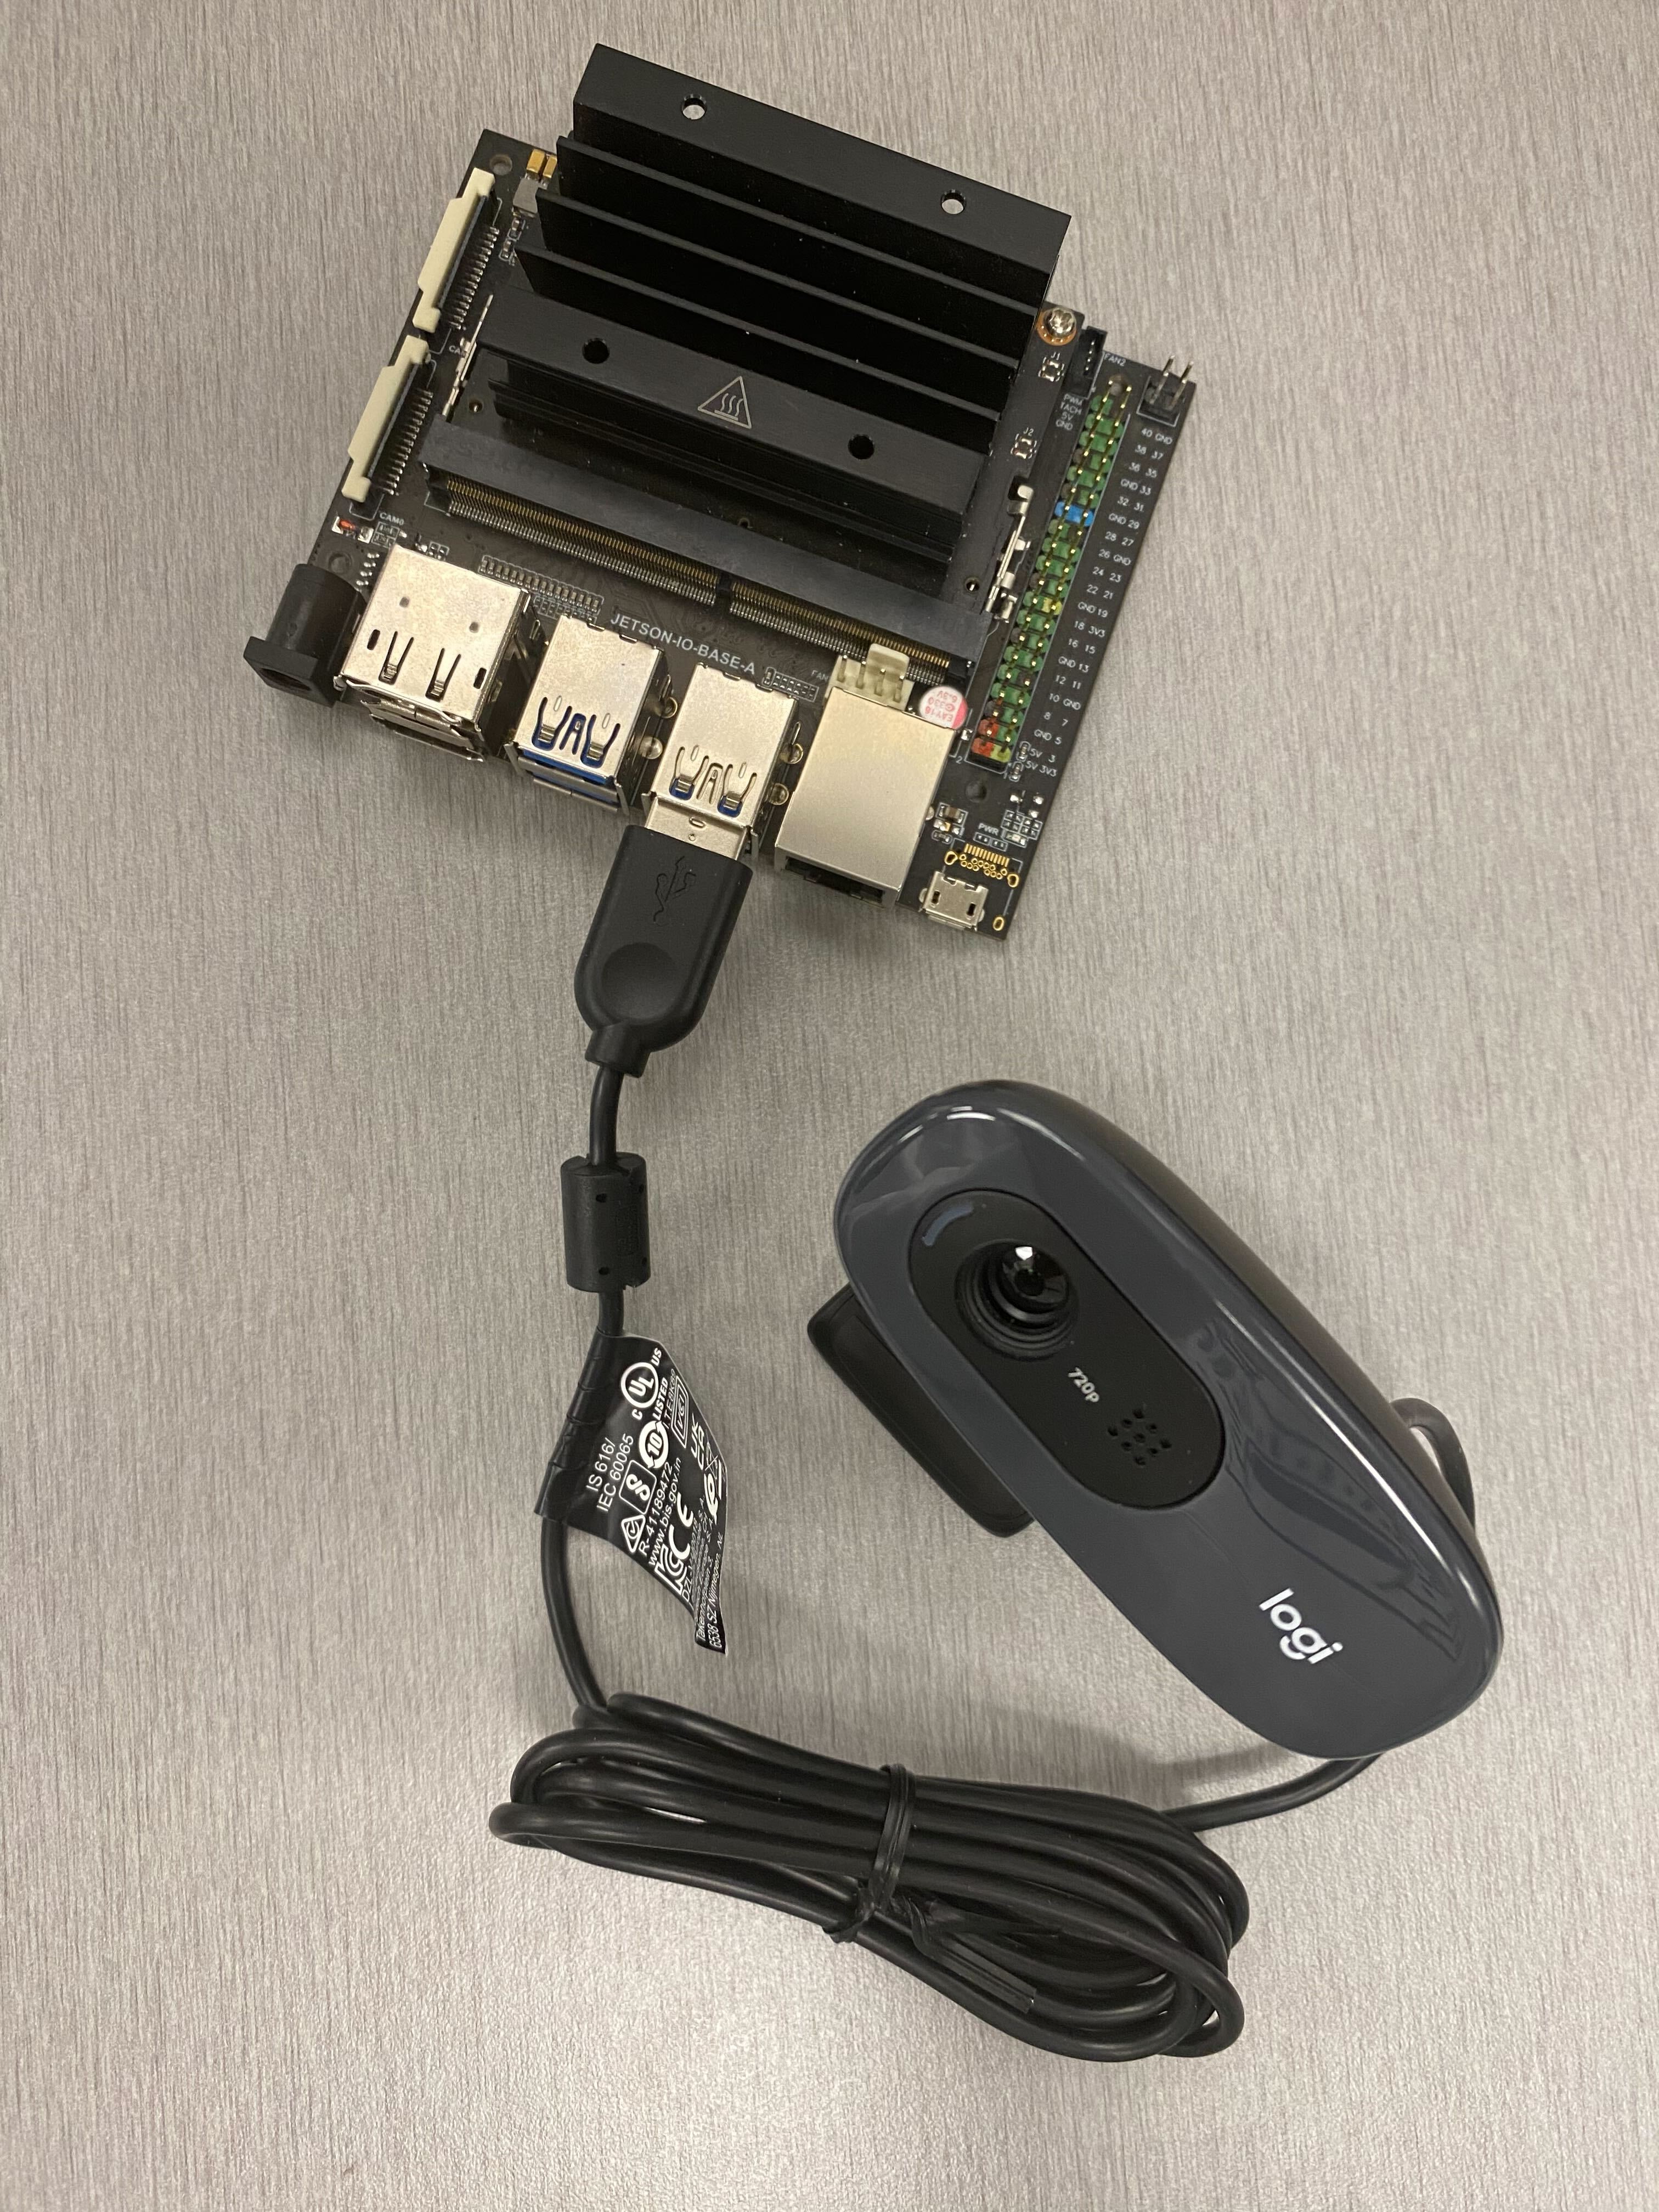 Install the web camera
Open the “.bashrc” file under home directory, and type export OPENBLAS_CORETYPE=ARMV8 at the end of the file.
If you can not find “.bashrc”, it is because it is a hidden file. To make it appear, follow this guide
Then source .bashrc in the terminal:
1
source ~/.bashrc
Data acquisition
Create your project folder, in a terminal:
1
mkdir jetson_project
Go to the project folder:
1
cd jetson_project
Create a “data” folder and a “scripts” folder:
1
2
mkdir data
mkdir scripts
1. Install dependencies:
Open a terminal, activate the created virtual environment,
1
source ./your_env_name/bin/activate
1
2
sudo apt update
pip install opencv-python
2. Test video streaming
Now we can test image capture using opencv-python package by the following script:
1
2
3
4
5
6
7
8
9
10
11
12
13
import cv2

# 0 means /dev/video0, you may adjust this value if you have another camera.
cam = cv2.VideoCapture(0)
while True:
  check, frame = cam.read()
  cv2.imshow("video", frame)

  key = cv2.waitKey(1)
  if key == 27:  # 27 mean ESC in keyboard
    break
cam.release()
cv2.destroyAllWindows()
3. Save images using the keyboard
Here we show a simple demo about how to collect and save images.
1
2
3
4
5
6
7
8
9
10
11
12
13
14
15
16
17
18
import cv2

file_root = "/path/to/project/"  # change accordingly
count = 0

# 0 means /dev/video0, you may adjust this value if you have another camera.
cam = cv2.VideoCapture(0)
while True:
  check, frame = cam.read()
  cv2.imshow("video", frame)

  key = cv2.waitKey(1)
  if key == 32:  # 32 means space
    cv2.imwrite(f"{file_root}/{count}.png", frame) # save images
    count = count + 1

cam.release()
cv2.destroyAllWindows()
Dataset Creation
We will use Roboflow, an online image annotation platform, to generate our dataset.
Sign up for an account and create a project. Then we can start uploading the collected from Jetson Nano.
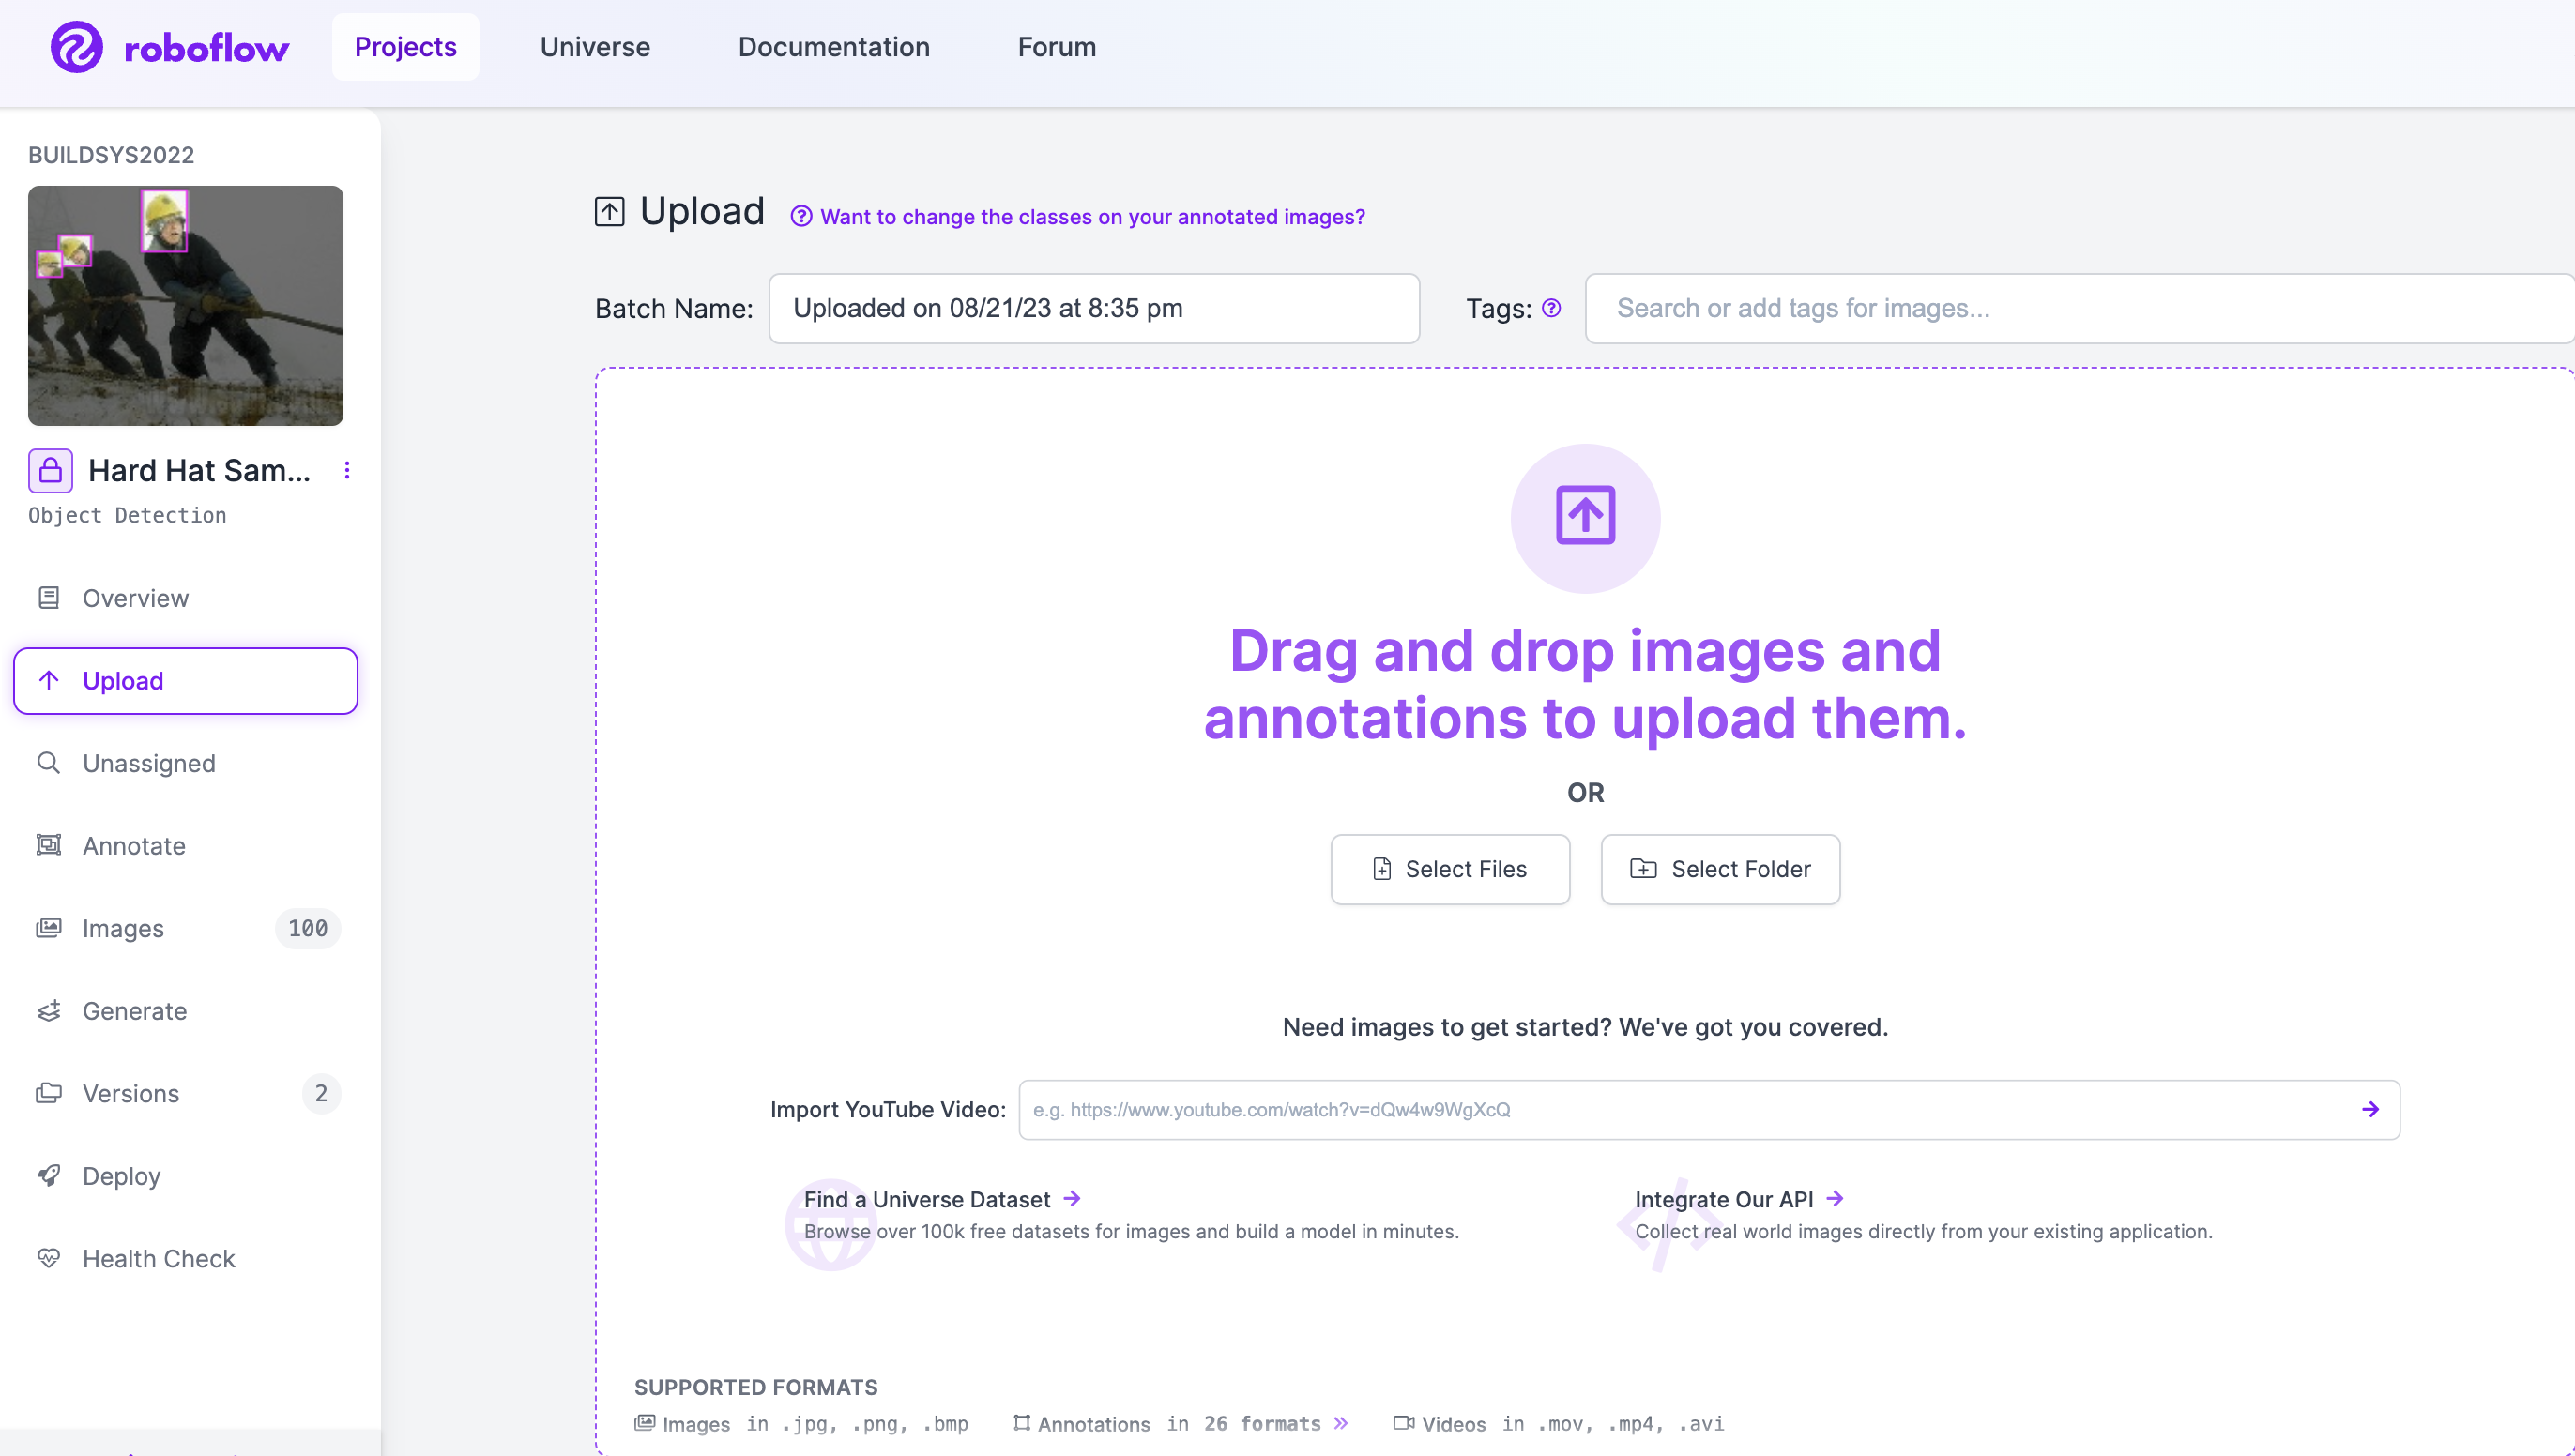 Upload the collected images
After uploading the images, assign annotation tasks to your team members and we can now start annotating.
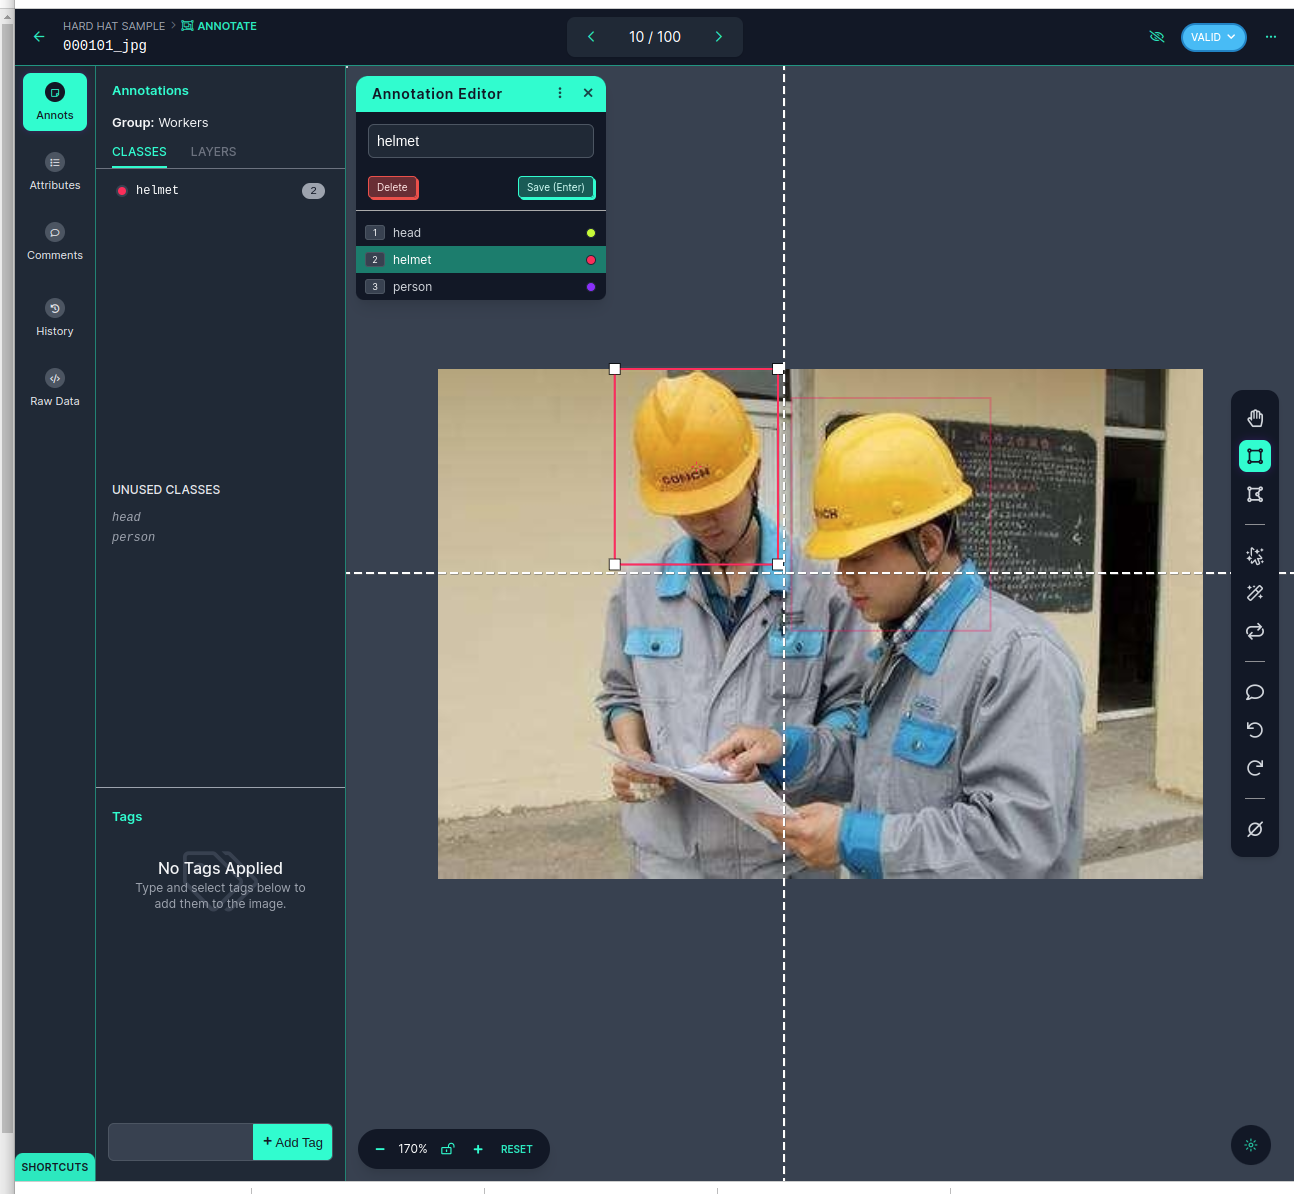 Annotate the uploaded images
We can use the “box” to crop an object such as the helmet and create a label for it.
After the annotation, we can now generate the dataset!
First, split the dataset into training, validation, and testing. Commonly, the ratios are around 7:2:1.
Then, add data preprocessing (e.g., cropping) and augmentation (e.g., blur and rotation).
Finally, just click on “generate” to generate a version of the dataset.
 Generate dataset
In the “version” section, select an annotation format (e.g., YOLOv8) and click on “Get Snippet”.
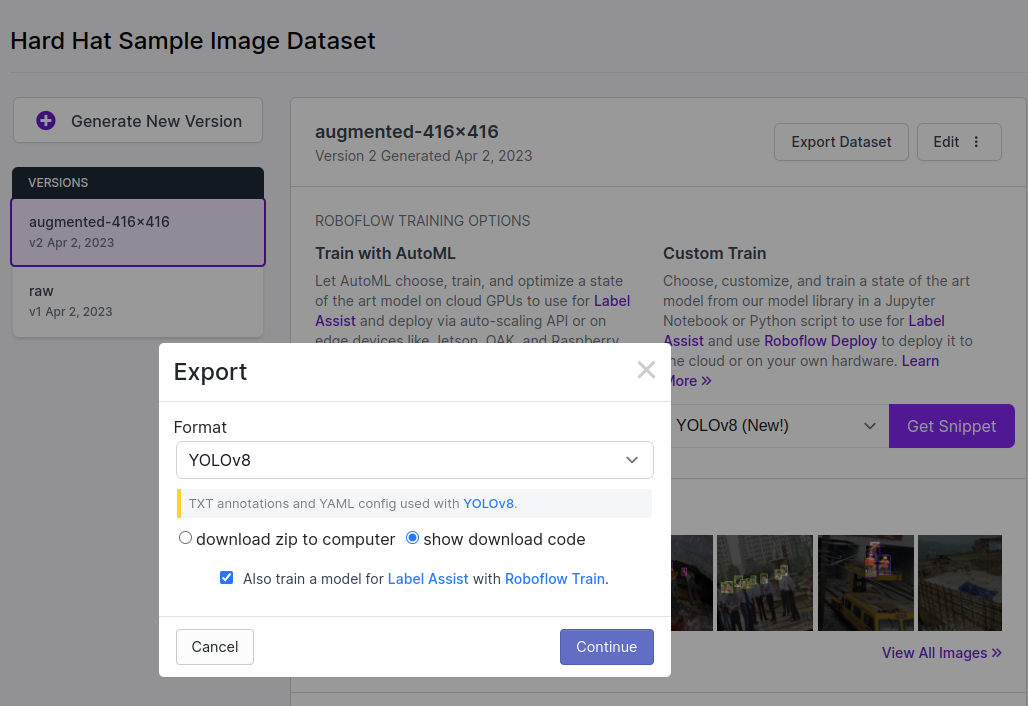 Download dataset
There are two ways to download the dataset. First, we can just download a zip file and extract it to a local folder. Second, we can download it by running a script copied from the snippet like the following:
1
2
3
4
5
6
7
# This is just a template
!pip install roboflow  # remove this line if you have installed it

from roboflow import Roboflow
rf = Roboflow(api_key="SUWxwWJf88eAaWZdhWnx")
project = rf.workspace("xmagical").project("hard-hat-sample-jebrb")
dataset = project.version(2).download("yolov8")
For example, we can download the dataset under “./data” folder.
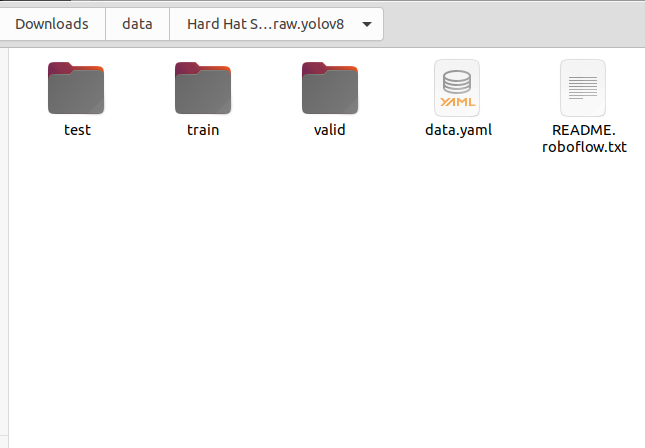 Content of dataset folder
The “data.yaml” file is a configuration file that sets up the label names and dataset paths. An example of it is the following:
1
2
3
4
5
6
7
8
9
10
11
12
13
train: ../train/images
val: ../valid/images
test: ../test/images

nc: 3
names: ['head', 'helmet', 'person']

roboflow:
  workspace: xmagical
  project: hard-hat-sample-jebrb
  version: 1
  license: Public Domain
  url: https://app.roboflow.com/xmagical/hard-hat-sample-jebrb/1
We may have to change the train, val, and test path to an absolute form in the data.yaml, for example:
1
2
3
train: ~/Downloads/data//Hard Hat Sample.v1-raw.yolov8/train/images
val: ~/Downloads/data//Hard Hat Sample.v1-raw.yolov8//images
test: ~/Downloads/data//Hard Hat Sample.v1-raw.yolov8//images
Model Training and Inference
We will utilize the training pipeline provided by Ultralytics.
Install Ultralytics package and other dependencies
1. Install Ultralytics
Open a terminal, and activate the created virtual environment:
1
2
3
source ./your_env_name/bin/activate
pip install torch==1.12.1 torchvision==0.13.1 torchaudio==0.12.1
pip install ultralytics==8.0.159
You can test if the packages are installed successfully by running the following command:
1
yolo predict model=yolov8n.pt source='https://ultralytics.com/images/bus.jpg'
And check the results under “./runs/detect/predict”.
2. Alternative way to install PyTorch
In case PyTorch installation fails.
Download PyTorch wheel file from this link.
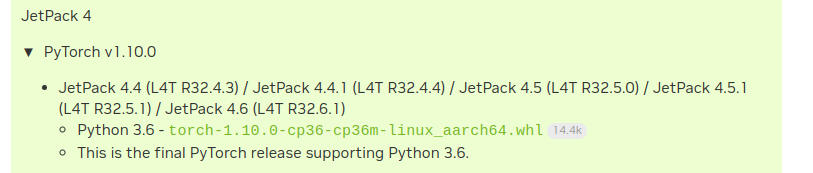 Download Pytorch wheel file
Click on “torch-1.10.0-cp36-cp36m-linux_aarch64.whl” and download it to your project directory.
Set the install path by:
1
export TORCH_INSTALL=path/to/torch-1.10.0-cp36-cp36m-linux_aarch64.whl
Then install PyTorch by:
1
2
3
4
5
python3 -m pip install --upgrade pip
python3 -m pip install aiohttp numpy=='1.19.4' scipy=='1.5.3'
export "LD_LIBRARY_PATH=/usr/lib/llvm-8/:$LD_LIBRARY_PATH"
python3 -m pip install --upgrade protobuf
python3 -m pip install --no-cache $TORCH_INSTALL
Train your model
1. Initiate the training
Thanks to Ultralytics, we can train the object detection model by simply running the following command line:
1
yolo train data=~/Downloads/data/data.yaml model=yolov8n.pt epochs=100 lr0=0.01
Change the value of “data” argument accordingly.
Ultralytics provides a series of models with different sizes. “epochs” (i.e., number of epochs to train) and “lr0” (i.e., initial learning rate) are hyperparameters. A list of hyperparameters can be found at link.
2. Track the training progress
After starting the training, the program may ask you to log into wandb used to track training progress.
Sign up for an account on wandb website, and go to “User Settings”. Find “API key” section and copy the API key:
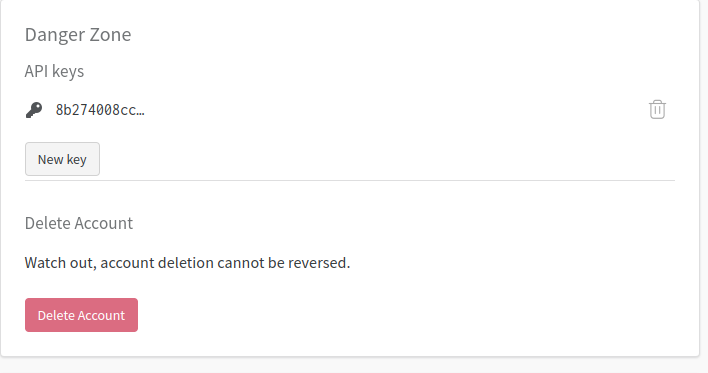 Get API key from wandb
Enter the API key in the terminal if required.
After the training is completed, the model is automatically saved to a local folder.
Model inference
There are two ways to model inference.
First, we can use Ultralytics CLI commands:
1
yolo detect predict model=path/to/best.pt source=/path/to/test.jpg
Second, we can write script in Python, an example would be:
1
2
3
4
5
6
7
8
9
from ultralytics import YOLO

test_image_path = "/path/to/test.jpg"

# load model
model = YOLO("/path/to/runs/detect/train1/weights/best.pt")

# predict and save result
result = model.predict(source=test_image_path, save=True, imgsz=384, conf=0.5)
Here we provide a trained model for RickRoll detection, download the model by this link https://github.com/YESAndy/yesandy.github.io/blob/main/_data/rickroll_best.pt
To do realtime inference, here is a demo script:
1
2
3
4
5
6
7
8
9
10
11
12
13
14
15
16
17
18
19
20
21
import cv2
from ultralytics import YOLO

file_root = "/path/to/file/root/"
# initiate yolo model
model = YOLO(file_root+"/yolov8n.pt")

# 0 means /dev/video0, you may adjust this value if you have another camera.
cam = cv2.VideoCapture(0)
while True:
  check, frame = cam.read()
  results = model.predict(source=frame, conf=0.5)
  annotated_frame = results[0].plot()
  cv2.imshow("video", annotated_frame)

  key = cv2.waitKey(1)
  if key == 27:  # 27 mean ESC in keyboard
    break
cam.release()
cv2.destroyAllWindows()
Ubuntu command cheatsheet
| Description | Command | Example |
|---|---|---|
| Parameter sign | $ | |
| Change directory | cd $directory | |
| List the items in the current directory | ls | |
| Create folder | mkdir folder_name | |
| Execute commands as admin | sudo | |
| Update Debian package | sudo apt update | |
| Install Debian package | sudo apt install $package_name | |
| Check ip address | ifconfig | |
| Assign parameter value | export someparameter=somevalue | export CUDA_HOME=/usr/local/cuda |
| Print out parameters | echo $someparameter | echo $CUDA_HOME |
Reference
- TRT-POSE https://github.com/NVIDIA-AI-IOT/trt_pose/tree/master
- Install PyTorch in Jetson https://docs.nvidia.com/deeplearning/frameworks/install-pytorch-jetson-platform/index.html
- YOLO-v8 architecture https://github.com/ultralytics/ultralytics/issues/189
- YOLOV8 demo with Jetson Nano https://wiki.seeedstudio.com/YOLOv8-DeepStream-TRT-Jetson/
- YOLO-V8 train your model with customized dataset https://blog.roboflow.com/how-to-train-yolov8-on-a-custom-dataset/
- Environmental sensor https://www.waveshare.com/wiki/Environment_Sensor_for_Jetson_Nano#How_to_use